Asana acquires StackAI — now every human-agent workflow runs in one place.Learn more
Project design in project management: 7 steps + tips

Summary
When it comes to managing projects, it can be hard to get everyone on the same page. With multiple moving parts, different deliverables, and cross-departmental collaboration, sometimes an initial project meeting just isn't enough.
Project design is an opportunity to align on ideas, processes, and deliverables. It's an early phase in the project lifecycle and often comes before a project plan or charter. Visual aids such as flowcharts, Gantt charts, and timelines are often used to help project stakeholders picture the project in this early step.
We'll go over the basics of project design, explain why it matters, lay out the seven steps to create a project design, and provide expert tips to help you better understand the process.
Effective marketing strategy templates
Streamline your marketing efforts with customizable Asana templates. Plan, track, and carry out your marketing strategy to reach your goals faster.
How project design works
Project design is an early phase of the project lifecycle where you define a project's key features, structure, success criteria, and major deliverables before detailed planning begins. Unlike a project plan, which outlines specific tasks and schedules, project design focuses on the high-level vision and strategic approach.
There are seven steps involved when creating a project design, including defining goals and using a visual aid to communicate objectives.

These visual elements include methods such as Gantt charts, Kanban boards, and flowcharts. Providing a visual representation of your project strategy can help foster transparency among stakeholders and clarify aspects of the project, including its overall feasibility.
Why is project design important
Project design sets the foundation for project success. By investing time in this early phase, you create a clear roadmap that guides your team from start to finish.
Here are the key benefits of effective project design:
Improved stakeholder alignment: Documenting goals and deliverables upfront ensures everyone understands the project's objectives, reducing miscommunication.
Better resource management: Identifying budget, tools, and team members before work begins prevents resource shortages and improves allocation.
Reduced project risk: Spotting potential risks early allows you to create contingency plans before problems arise.
Increased project visibility: Visual aids such as Gantt charts provide stakeholders with a clear picture of timelines, dependencies, and progress.
Stronger project outcomes: Teams that invest in project design are better positioned to deliver on time and within budget.
Without a solid project design, teams often struggle with scope creep, missed deadlines, and unclear expectations. Taking the time to design your project properly pays off throughout the entire project lifecycle.
The 7 steps of project design
Seven steps make up a successful project design process. These include everything from defining goals and baseline objectives to strengthening your strategy to help you stay organized while managing a new project.
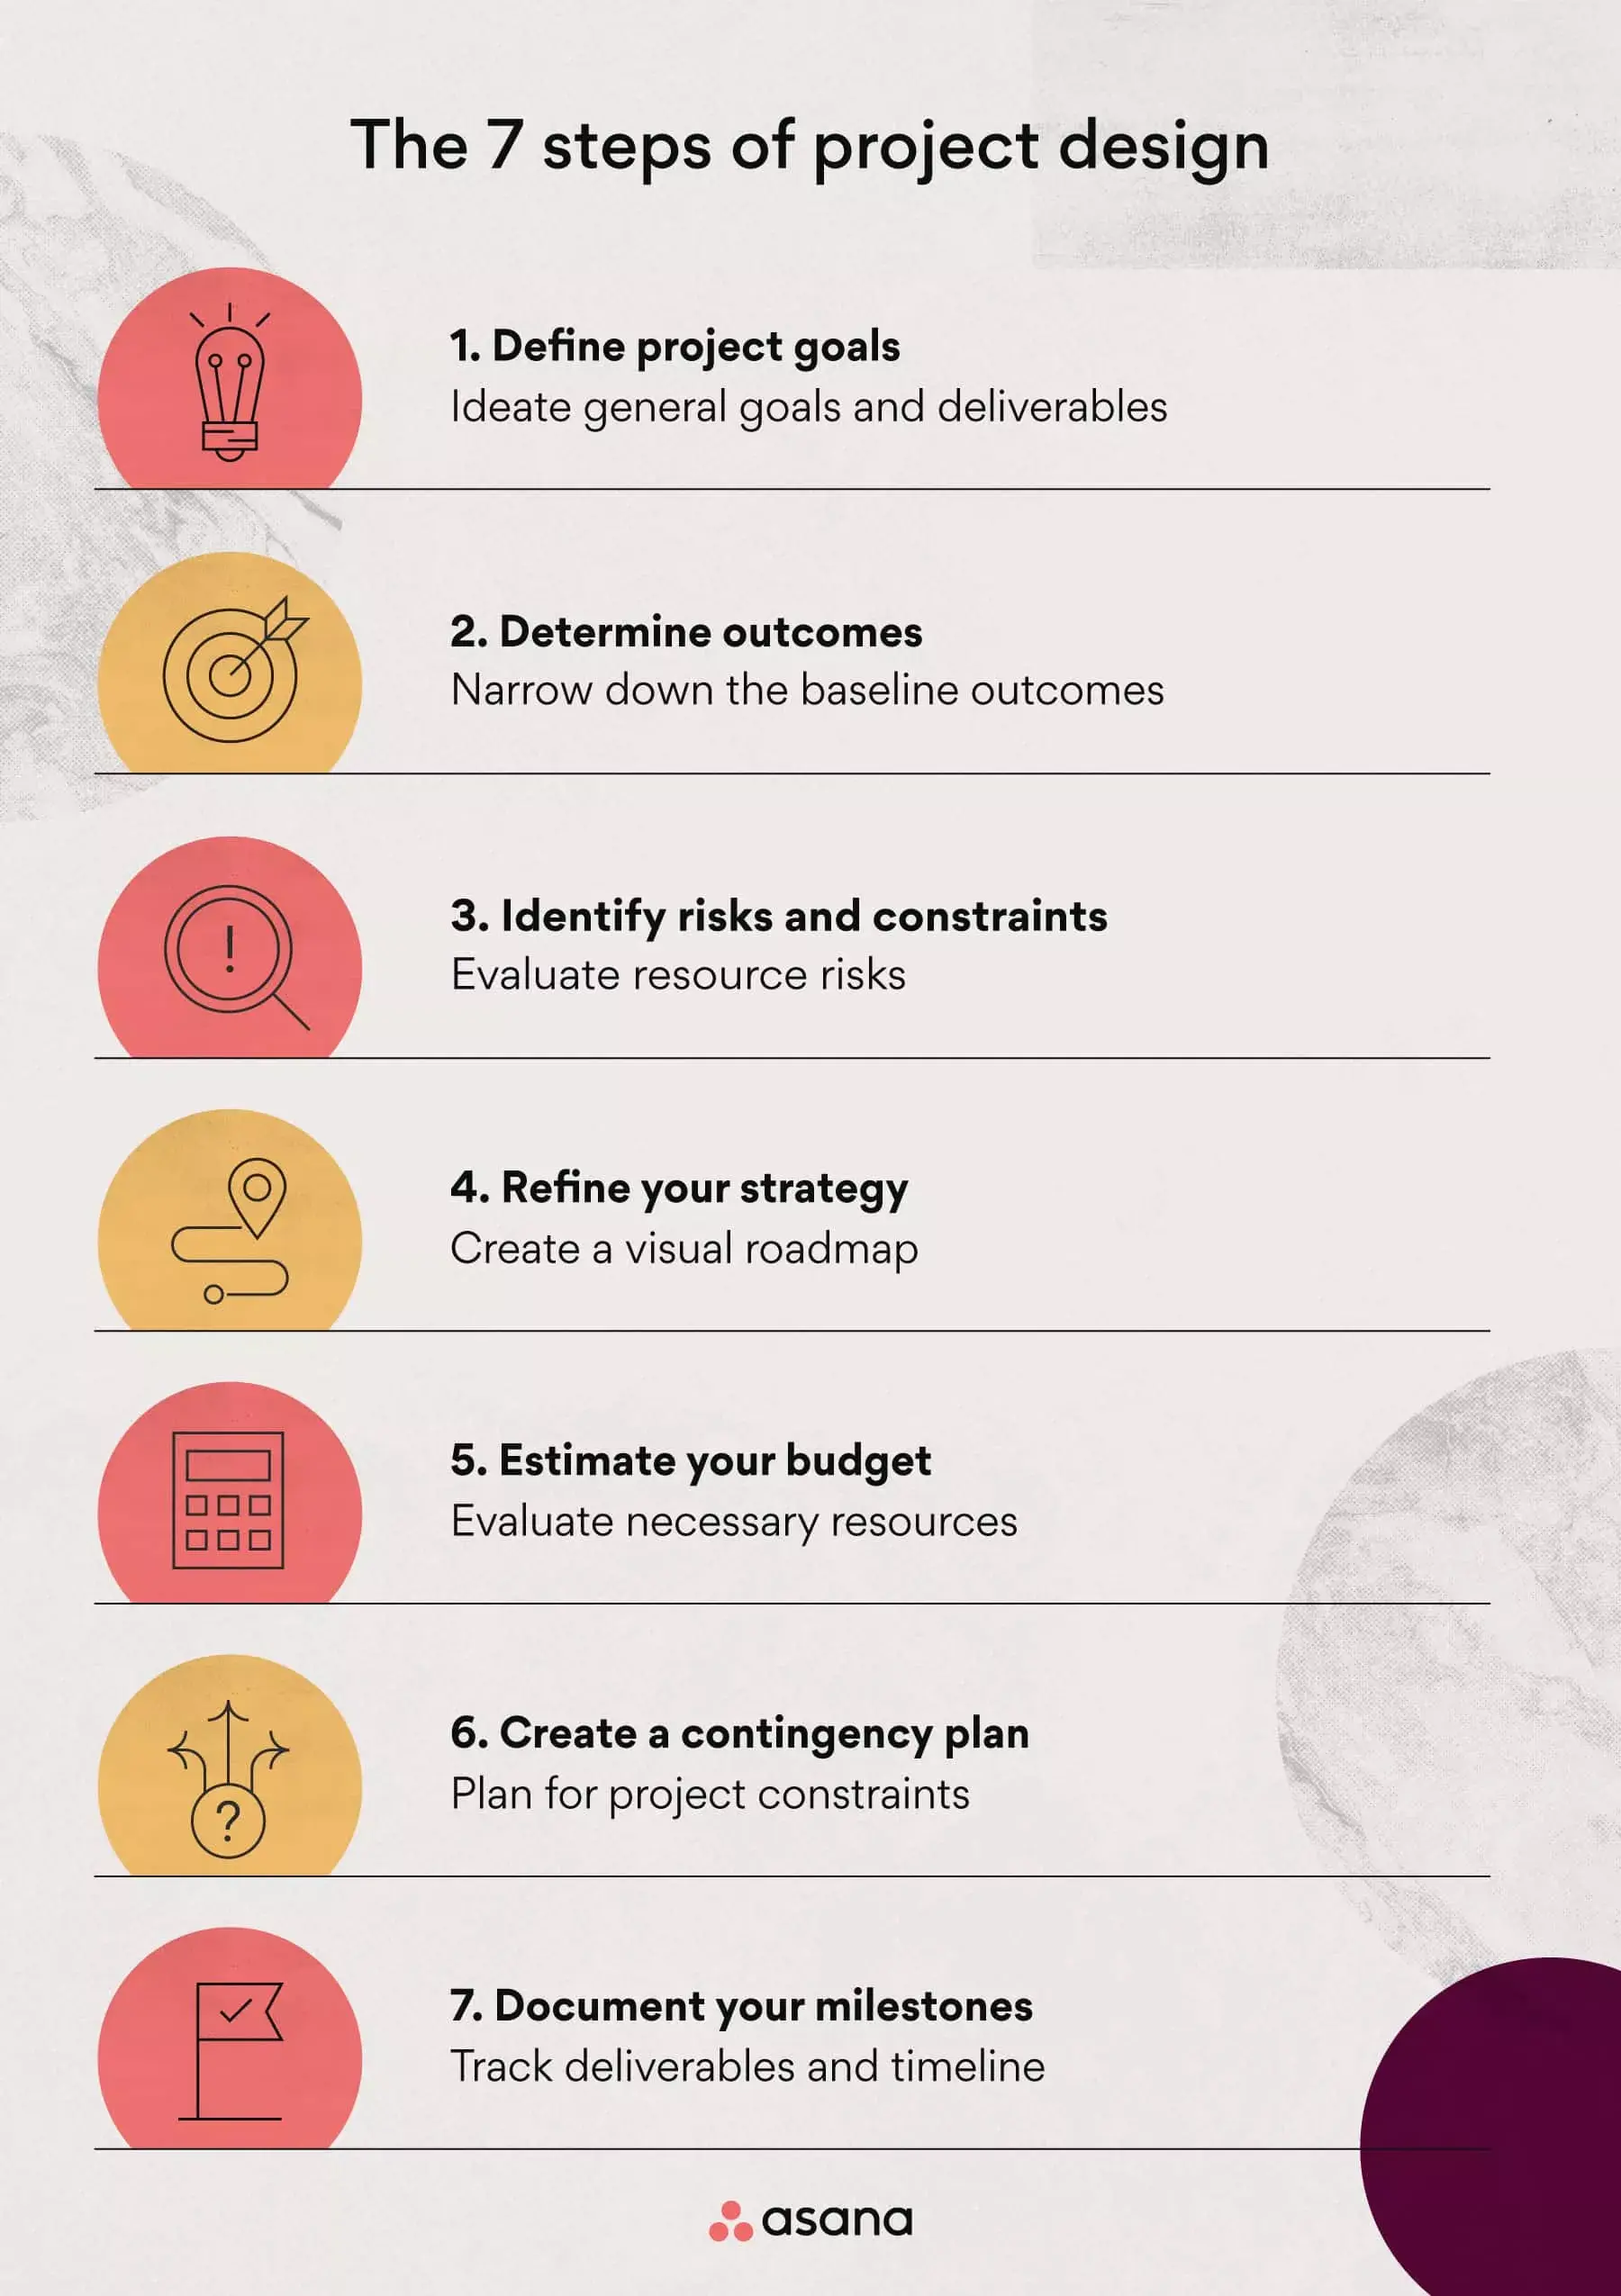
Let's go over each step needed to create a project design.
Step 1. Define project goals
In the first step, define your project goals by leading an initial ideation meeting. During this meeting, focus on:
Identifying stakeholder needs: What problem are you trying to solve?
Writing a project brief: Summarize the project scope and who is involved.
Documenting objectives: Once you've outlined basic goals, determine concrete objectives in detail.
Pro tip: Use SMART goals when starting your project design to better visualize your destination. SMART is an acronym that stands for specific, measurable, achievable, realistic, and time-bound.
Read: How to write an effective project objective, with examplesStep 2. Determine outcomes
Next, narrow down the project's outcomes. These are more detailed than initial goals and include the specific tasks you'll complete. For example, if you're adding a new landing page to your website, one outcome might be adding an email signup form.
Document outcomes and major deliverables alongside your goals to build a timeframe. Reference popular project management methodologies to decide which approach fits your project.
Pro tip: For complex projects, use the Agile methodology with iterations to break large tasks into short sprints. For more traditional projects, use the waterfall method, which provides a thorough step-by-step approach.
Try Asana for project managementStep 3. Identify risks and constraints
Once you've identified outcomes, consider your project risks and constraints. Evaluate aspects that could derail progress or waste resources.
To identify risks, assess the tools, funds, and timeframe needed. Resolve constraints before the project begins by following up with relevant stakeholders and project teams.
Pro tip: Use a risk register to analyze, document, and address project risks as they arise.
Step 4. Refine your project strategy with a visual aid
A project strategy is a visual roadmap of your project. This helps communicate purpose to team members. Create your strategy by choosing a visual aid to share with stakeholders.
There are many types of visual aids you can choose from, some of which include:
Flowchart: A flowchart is a visual representation of the steps and decisions needed to perform a process. Flowcharts are particularly helpful for visualizing step-by-step approaches and for effectively organizing project deliverables.
Gantt chart: A horizontal bar chart used to illustrate a project's timeline. The bars in a Gantt chart represent the steps in the project, and their lengths indicate the time required to complete each step.
Work breakdown structure (WBS): A WBS is the breakdown of all tasks within a given project. Project managers use work breakdown structures to help teams visualize deliverables while keeping objectives top of mind.
Mind map: A mind map is a hierarchy diagram used to visualize projects and tasks. It allows project managers to link deliverables around a central concept or idea, such as a specific team goal.
PERT chart: A PERT chart or diagram is a tool for scheduling, organizing, and mapping tasks. It can be helpful for complex projects and for estimating the time needed to complete tasks.
Since each visual tool differs slightly, choose the one that fits your team's needs:
Visual aid | Best for |
Flowchart | Smaller teams with straightforward processes |
Gantt chart | Timeline-focused projects with sequential tasks |
Work breakdown structure | Large teams managing complex dependencies |
Mind map | Brainstorming and linking deliverables to central goals |
PERT chart | Complex projects requiring time estimation |
Pro tip: Examine the features of each visual aid before adding one to your project design. Review each based on the amount of detail included, usability, and visual appearance to find the one that best fits your needs.
Step 5. Estimate your budget
Next, estimate your project budget to begin resource allocation. Your budget should account for profitability, available resources, and any outsourced work. In some cases, leadership may set a fixed budget you'll need to work within.
Your budget may need to be approved or revised based on leadership signoff. Once finalized, you can begin assigning beneficiaries, design documents, and tasks for your project. For complex projects, teams often rely on a design document template to capture technical requirements, dependencies, and specifications, along with the budget.
Pro tip: When it comes to resource allocation, implementing automated processes with automation software can improve efficiency and reduce project errors.
Step 6. Create a contingency plan
To begin assigning tasks, create a contingency plan. A contingency plan is a backup plan for the risks and constraints outlined earlier in the process. Having an organized plan when issues arise helps to resolve them in real time.
To create one, organize your risks using a Gantt chart or timeline tool and determine a plan for each risk. For example, if one of your risks is that materials don't arrive in time, your contingency plan may be to source materials from elsewhere or start on a different part of the project while waiting.
Once you've outlined a plan for each risk, you're ready to begin executing your project.
Pro tip: Use Asana to view lists, timelines, and Gantt charts to better visualize your project plan.
Step 7. Document your milestones
For the final step, document your team's milestones using a milestone chart. This ensures work is being completed on time and helps you identify inconsistencies as they arise.
You can do this using project management software, where stakeholders can access the information and progress. Manage these milestones until the end of the project to ensure tasks are completed on time.
Pro tip: Connect with project stakeholders regularly to monitor task dependencies and ensure short-term goals are met.
3 expert tips to improve your project design
Building an effective project design takes effort. Along with the seven steps above, here are a few tips to strengthen your approach.
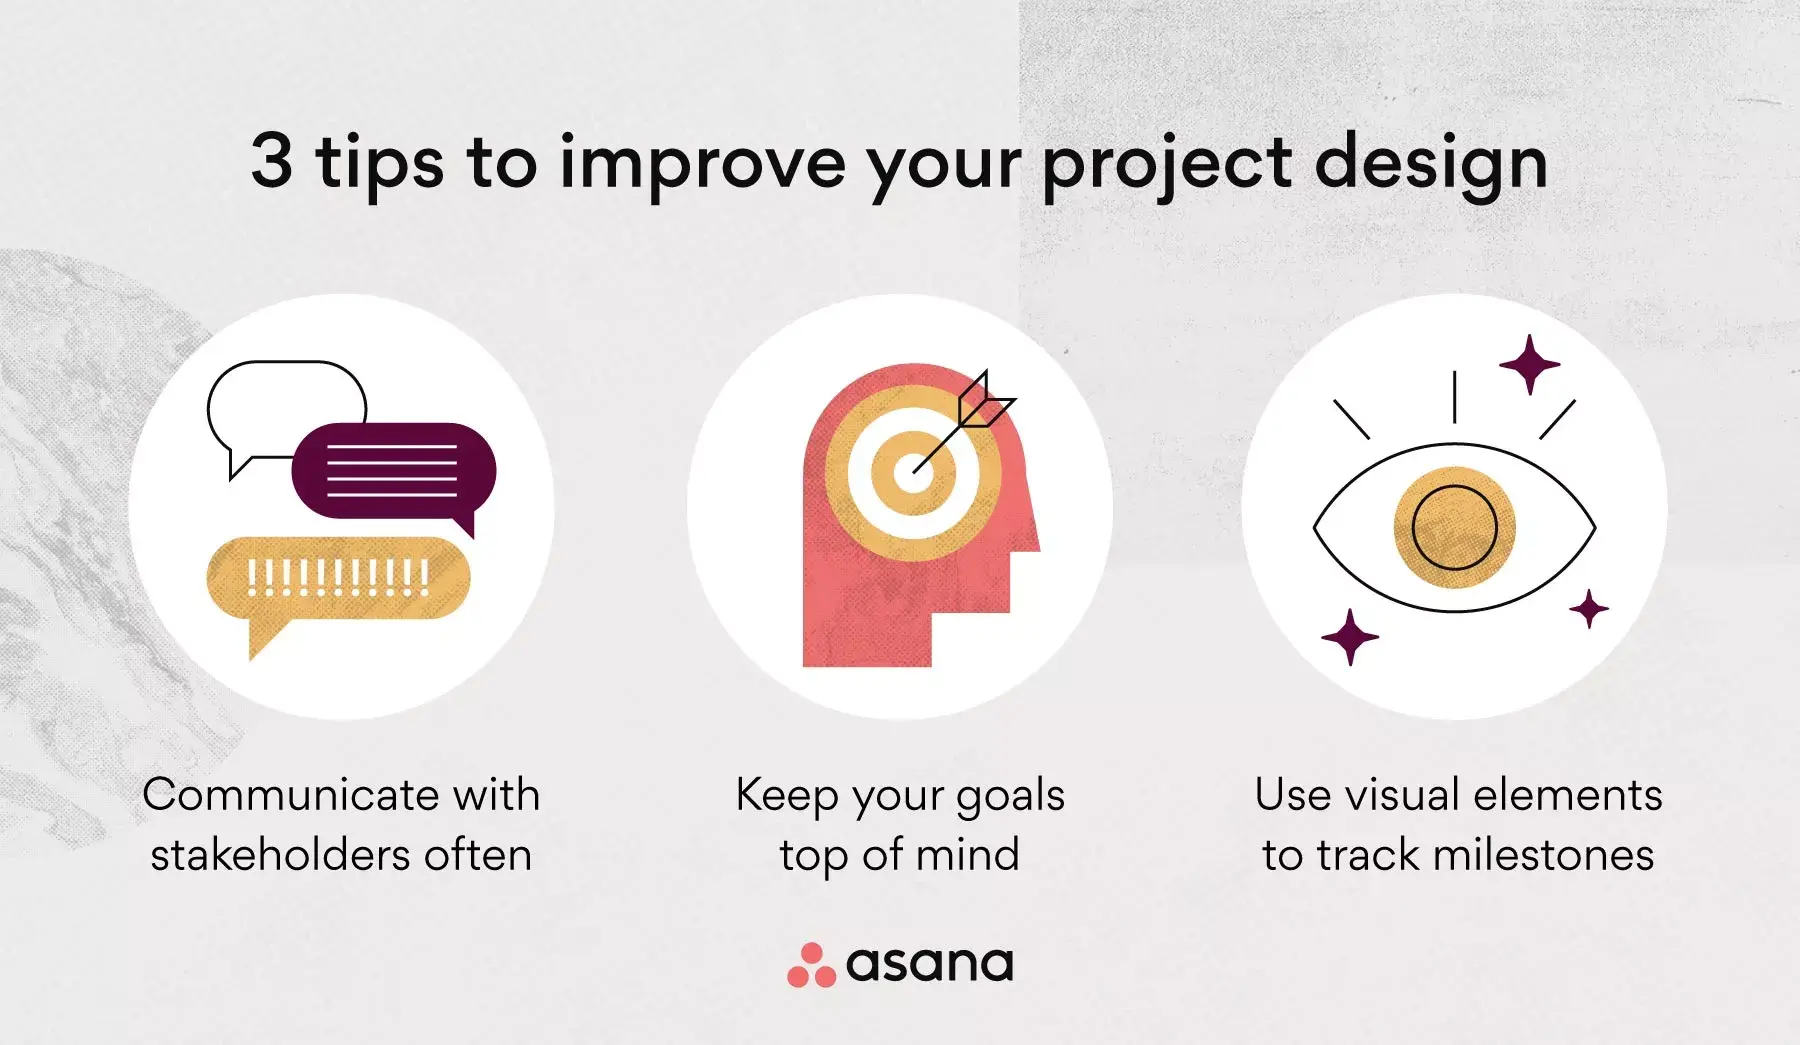
Keep these three tips in mind when building a project design of your own:
Communicate with stakeholders early and often: Effective communication is key, no matter the project you're working on. Collaborating early ensures all stakeholders understand the most important objectives. Lead meetings throughout the project and use workflows to streamline teamwork.
Keep your goals top of mind: Connecting your goals to project deliverables ensures objectives are met at every step. Use timeline software to easily connect goals with the work needed to complete them.
Use visual elements to track milestones: While a business case and daily to-dos are helpful, visual elements help stakeholders see the bigger picture. From Gantt charts to PERT charts, there are many ways to visualize your project work.
Beyond these three tips, always keep your team's best interests in mind. Providing the necessary information and scheduling work within reasonable deadlines will keep your team engaged and efficient.
Bring your project design to life with Asana
Project design is an important piece of executing a successful project. From gathering the necessary information and resources to coordinating with team members, your job is to bring the details to life. With the right project design, you and your team can tackle anything that comes your way.
Take the art of project planning to the next level with project management software. From streamlining work to improving visibility, Asana can help your team achieve more with clarity and confidence. Get started today and see how Asana can support your next project design.
Try Asana for project management